DIY Hat Rack Ideas
Every person is creative and full of imagination. Seeing things and tools lying around the house, plenty of ideas and imaginative thoughts are rushing to the mind.
One of many examples of creative ideas that you can build is a hat rack.
As you and I understand, a hat rack would give organization to your collection of hats.
Besides, a DIY hat rack would give you advantages.
Compared to a ready-to-buy product, your build will be more precise with the imagination you have in your mind.
The size, the design, the shape, and the additional necessities are handled correctly.
We have 50+ ideas to inspire you! Take a look, and hopefully, you can find the one!
DIY Hat Rack Ideas Inspired by Tree Branches

You must be familiar with the shape of the hat rack above.
As you can see, it is inspired by tree branches. Since the racks are made of real wood, it is okay if they are different in size, but you need to find durable woods that can hold as many hats as possible.
This concept saves some money for you because you only need to find the wood, paint in the desired color, and hook to install the wood on the wall.
Other than hats, this rack is handy for scarfs as well.
Don’t you like it? It is pretty easy, isn’t it?
Industrial DIY Hat Rack

These days, people are experimenting with new and uncommon ideas. Even though the idea is unusual, creativity has no limit.
This concept shows you that pipelines can also be used to build hat racks.
For hooks, you can use taps. You can also bend the angle to hook the hats if without taps.
The idea of this concept is to appear as pristine as possible.
You can alter the color using spray paint or decorate the pipes with something like taps or other stuff related to pipes to make it more natural.
We sure you can do this project. This sounds fun and challenging!
DIY Pallet-Inspired Hat Rack

A wood pallet would certainly likewise make a great coat shelf. Before you get to place it on the wall surface and add the hooks, you’ll have to paint it.
This one comes from a wooden pallet. A wooden pallet is strong enough to hold coats, let alone hats.
Using a wooden pallet, you have the freedom to paint each pallet differently. Painting each pallet with different color will increase the attractiveness.
The colorful pallets will give your room a cheerful atmosphere.
Additionally, you can place this wooden pallet hat rack anywhere you desire.
DIY Hat Rack Wall Mount

This hat rack is as simple as it is seen in the picture above. The process takes a short time because the design is not too complicated.
All you need is a board of wood that has the thickness you required. Then, complete the use with some hooks or hangers for the hats.
The hooks or hangers are installed on the front part of the wood.
After appropriately installed, fix the wood on to the wall. You can install it above the doorway if you like it.
DIY Wood Repurposed Hat Rack

The concept of do-it-yourself is to repurpose things to minimize the expenses.
Usually, these things are old, rustic, antique, and vintage.
That is okay! A vintage-style hat rack would be good for the atmosphere of the room.
- To create this product, you need an old window panel.
- Then, install the window panel on to the wall using nails or hooks.
- Also, you need to fix some hooks on the wood’s surface for the hats as well.
- Then, you can paint or decorate the wood as you like it to match the theme of your room.
DIY Contemporary Hat Rack

Hat Racks are not always made of woods. It can be made of other things such as pipes or light fixtures, as shown in the above picture.
This concept has its uniqueness because the design is not antique, nor too modern; it is contemporary.
More to it, you can install a light bulb in each tool to give the elegance vibe to it. This one is different from the other because it is hanging from the ceiling instead of standing on the floor.
DIY Ruler Coat Hat Rack

If you have an old benchmark or wood pallet lying around the house or the warehouse, it can be repurposed to a unique, antique-looking of a hat rack.
- Firstly, you need to measure the size and the dimension of the place you want the rack to be installed.
- Then, you need to buy iron hooks for the hats. The number can be adjusted to your desire.
- Before installing the hooks, measure the gap between each hook for spaces for the hats.
- After finishing it, you can proceed by adding some designs or painting color to the wood.
The picture above shows a ruler design drawn on the wood. It may inspire you to create your imagination. You would definitely love it!
DIY Animal-Themed Hat Rack

We bet you are going to like this one!
This unique and out of ordinary decoration will elevate the atmosphere inside of the room. Your kids are going to like it as well.
As you see, you need toy animals. The animals can be adjusted to what you like.
Then, saw, adhesive, or hooks (if you use hooks, then you need a drill), scrap wood, and paint.
- Firstly, paint the scrap wood with your desired color or any color which matches the base.
- Then, collect all the toy animals and cut them in half—all you need is the front part of their bodies.
- Secondly, place each of the animals on a wooden block.
- Thirdly, to stick the animals on to the scrap block firmly, you can either use adhesive or drill holes for hooks.
- If you choose to use adhesive, let them for a day before mounting them on the walls.
Animal Design Hat Hooks

If the toy animals are too scary for your kids, this idea may be better. The design is still about animals, but more cutely so your children will like it.
The requirements for this idea are a wood board, sandpaper, guide, paint, pet layouts, sticky pattern movie, pattern tape, hooks, screws as well as hanging equipment.
- Firstly, the wood board needs to fulfill your desired size to match with the provided space. Then, paint the board with white color as the base.
- After printing out the animals’ template—you only need the back part of the bodies, stick the pattern on to the board.
- Lastly, you need to paint the hooks to match the tail of the animals.
Insulator Layer Shelf

This is another intriguing idea for hat rack—or hooks for coats.
- You need a wood board, insulators (the number depends on your desire), and screws or nails to secure them.
- Then, sustain the insulators using securing tools.
- Before doing the process, cut them to the size you will need.
- Also, create an opening in each insulator to connect it to the base with a screw.
- To strengthen the connection, you can also use adhesive.
- When it is done, the rack can be installed inside or outside of the house.
Coastline Style Inspired Hat Rack

Living in the coastline requires you to be fast. The hats should be placed in an easy-to-reach spot. That is the idea implemented for this concept.
What are the things that remind you of the coastline?
Other than the sand and the beach, you should remember about the paddles.
Yup!
Paddles make fascinating decors for a house. They would make the room looks more appealing just by placing them on the wall surface.
Or, transform them into some things more beneficial, such as a layer shelf.
You need to connect some hooks to the paddle as well as place it on the wall surface. When you mount the hooks on to the paddle, be careful not to cause any damage to the paddle.
Lego Themed Hat Rack

Some words to describe this idea: colorful and playful!
This is very suitable for children because it utilizes Lego toys as the design. You need to have a complete Lego set.
Then, you need to assemble the pieces to create a Lego-inspired hat rack.
With three hooks—or more, you can hang not only hats but also coats, backpacks, etc. You could make the block on your own or ask another person to help.
Don’t you think this is fun?
DIY Hat Rack Made of Letters

This hat rack is made of letters. As seen, the letters are H-O-M-E, but you can design the letters as you like it.
It can be L-O-V-E if you want!
To create this rack, you need cable cutters, cord pliers, heavy metal cable, layered telephone angling, tape, and also cable.
- Firstly, decide the letters you want to use.
- Secondly, cover the letters firmly in a tinted cord.
- Thirdly, count how many hooks you need.
- After that, cover the cable from the letters to the cord on among the layer hooks.
- Additionally, utilize an angling cord to give extra decoration.
Ski Board Hat Rack

Skiboard is not only useful for skiing, but also a hat rack. These days, youngsters are crazy about vintage furniture.
This would be a good idea for their home decorations. You need an antique skiboard. If it is not from home, perhaps, it can be found in the cheap market.
- Firstly, fix some antique hooks on to the front surface.
- After installing the antique hooks, you can now fix the skiboard hat rack anywhere you like;
- however, it would look best in the mudroom or entrance where people usually take off their hats and coats.
Autumn-style Hat Rack

To create this rack, you need to have a timber, handles, screws, some paint as well as a screwdriver.
- The first step is to repaint the timber with your desired shade and then leave it to dry completely.
- The next step is to create a hole in the timber to later place it on the handles.
- The last step would be connecting the screws and then bent the handles towards the screws.
Key Holder Hook

This concept is utilizing old door locks and the handles to hang anything from bags, coats, and, most importantly, hats.
This is uncommon, yet an imaginative idea. This concept would give your room a modern vibe. The bright and straightforward colors would give spirit to the house dwellers.
The locks are installed on a wood board, then the wood board is connected to the wall using adhesive.
Hat Hooks Made of Faucets

Faucet is not useless when it is broken. As proof, it can be used as hooks for a layer wall mount. Other than using the ones you have at home, you can also buy them in the store.
The only thing you need to do is to connect them to a piece of large wood—or to any material that supports the faucet and strong enough to hold the hats or coats.
Reclaimed Wood Hat Rack Hooks

If you admire the appearance of a wood pallet, this may be right for you.
- You will need to find 4 wood pallets with a similar size and 2 more for the back.
- Take your nails and hammer them down to connect each of the pallets together.
- Then, you also need to nail some hooks on to the pallet’s surface.
- After that, mount the finished pallet on to the wall.
Voila! The hooks are ready for you to use!
Unique Chevron Hooks
You don’t need to try too hard to think of imaginative or out of the box ideas.
Sometimes, the simplest idea is the best one. These racks are made of pieces of wood with some hooks mounted on the surfaces.
As the finishing step, to make it more interesting, you need to repaint the wood with chevron stripes.
Don’t you think this is easy?
Mounted Wooden Hooks

Simplicity is the best policy. As seen in the picture, the hooks are installed on the surface of the wood, which is mounted to the wall. The making process is not too complicated.
- All you need to collect are the wood board, hooks, screws, nails, adhesive (if needed), and other stuff required.
- Then, install the hooks on to the wood’s surface using screws.
- After that, glue the wood to the wall using adhesive.
The rustic wood would give your house a sense of vintage and antique vibes.
Tree branches Coat and Hat Rack
It can be difficult to not have a coat rack during this rainy season and cold weather.
To hang a coat, you can utilize tree branches from your backyard and change them into an artistic work; that is the coat hangers like above.
You only need to find branches or twigs—any of the two that is strong enough to support the coat’s heaviness.
Then, cut the branch in half and glue them to the wall’s surface using adhesive.
Tree Design of Hat Hooks

For the children’s bedroom, it is best to be a bit playful with the design and the color.
For example, this idea utilizes a tree design mounted on the wall. It is a long pipe with branches on top of it.
It may be a bit hard to find the materials needed, but you can draw the lines and circles on the wall and then paint them.
To hang the coat, install some hooks on each of the bubbles to make the coat looks like it is hanging on the drawn bubble.
World Map Hat Rack

Seeing the map makes you want to travel somehow. It gives you the spirit to be active.
So, this idea takes advantage of a large wood that has been cut into a map pattern.
Then, the wooden map is painted with appropriate color precisely like the actual map, or as you like it.
Lastly, hooks are installed at the bottom part of the wood.
You can decide on the number of hooks, even though it is best to measure the gap before nailing all the hooks.
The Clothes Pins Hat Rack

This one is a bit unique and simple. The concept is to use a cord and as many clothespins as possible, and the hat is pinned using the clothespin.
This is suitable to be placed on a wall with a white base. Using a white base, the colors of the hats will pop out and make the atmosphere brighter.
A Simple Twig Hooks Idea

When you walk down the street, you may find a twig lying on the ground. This time, when it happens, you need to take it home and turn it into a masterpiece.
This idea is using one simple twig and iron hooks to hang the coat, bags, or hats.
But, you also need strings and nails to install this new hook to the wall.
- First, tie each of the points of the twig.
- Then, put a nail on one end, and another on the other end.
- Finally, hang the twig on the nails.
Corner Hat Rack

Do you know this iron, layer shelf?
Yup! This is the construction site hat rack idea. The old, rustic looking iron can give a vintage vibe to the room.
If the color doesn’t match the entire atmosphere, then you can change it with a new paint color. The rack provides at least 8 hooks, which is more than enough for a hat rack.
Tree Trunk Standing Hat Rack

If you want to be connected with nature, this idea utilizes a tree trunk on top of a black painted wood board.
You need to have a wood board, a tree trunk with as many branches as possible, and paints in different colors— the picture shows black and white colors.
- Firstly, alter the wood board and the trunk into the desired size.
- Then, paint them with your favorite colors.
- Make sure that the colors match the theme of the room.
Repurposed Photo Strings Hat Rack

Photo strings are available in stores that sell home supplies.
Usually, the product comes with photo pins. To imitate this look, you can also use strings and pins used for hanging clothes.
To install the product, you only need to hammer some nails on to the wall with a measured gap.
Then, tie each end of the strings to the nails.
Hooks on The Wall

If you are a fan of organization and order, this may be for you.
As simple as it is seen, you need to buy nails in any number you want.
Then, place the nail orderly on the wall’s surface.
This idea has been made easy. Your collection of hats is now neat and tidy.
Clothes Hanger Tails Hat Rack

In order to save some space, you can use the back of a door. Utilize this space to hang a hat rack, which is made of a long wood. On the wood, install a smaller size of wood board with precise gaps.
You can paint the wood to make it look fresher, but to stay on its vintage style, you may want to keep the original shade.
Golden Hooks on the Wall Hat Rack

This great idea is suitable for you who want to use a little space to organize your hats. The gorgeous hats need to be displayed, so people can see how great your taste in hate is.
The tools you need would be styled hooks and some nails. You need to find hooks that are suitable for your style, then nail them on the wall in neat order.
Hanging Hat Rack Hooks

This idea is pretty uncommon because you utilize some ropes or unused belts. The ropes are hanging from the ceiling to the height that you can reach.
At the middle to the bottom of the ropes, with gaps that you have measured correctly, place hooks for the hats. This is super easy for you to make and very unique.
Modern Wooden Pallet Hooks

To keep up with the trend, this idea offers a modern style hook.
- Firstly, you need to prepare a wide wooden pallet and a drill.
- Secondly, drill holes on the surface with measured gaps—enough space for hanging medium to small size stuff.
- Then, you need long and cylinder-shaped woods to be inserted into the holes.
Make sure the tip of the cylinder comes out because that will be used for hanging.
Old-rustic Wood Pallet Hat Rack

If you happen to live in a house with a vintage style, this one may be the right one for you. You need two long and large wood pallets and two small wood boards for the sides.
In the picture, the small boards are carved with an antique design. You can connect each piece using nails or adhesive. It is suggested to use adhesive.
White Retro Hat Rack

“The simpler, the better” is the motto of this design.
It utilizes an old, retro-looking hook attached to the surface of the wall. The white color looks very suitable for the base since the base is painted in a darker color.
Overall, it creates a balance, which makes the rack looks simple, yet still looks elegant.
Repurposed Wooden Doors Hat Racks

Do you have so many hats that it becomes impossible to store them in your closet?
Well, read this one carefully.
If you have open space on the wall, enough for a couple of unused wooden doorways, then this is your guidance.
- To preserve the rustic style on the doors, don’t repaint them.
- Install the doors to the wall using either adhesive, nails, or some really strong hooks.
- Then, for the hats, hammer the nails to install the hooks properly on to the doors.
- Now, your hats become more organized.
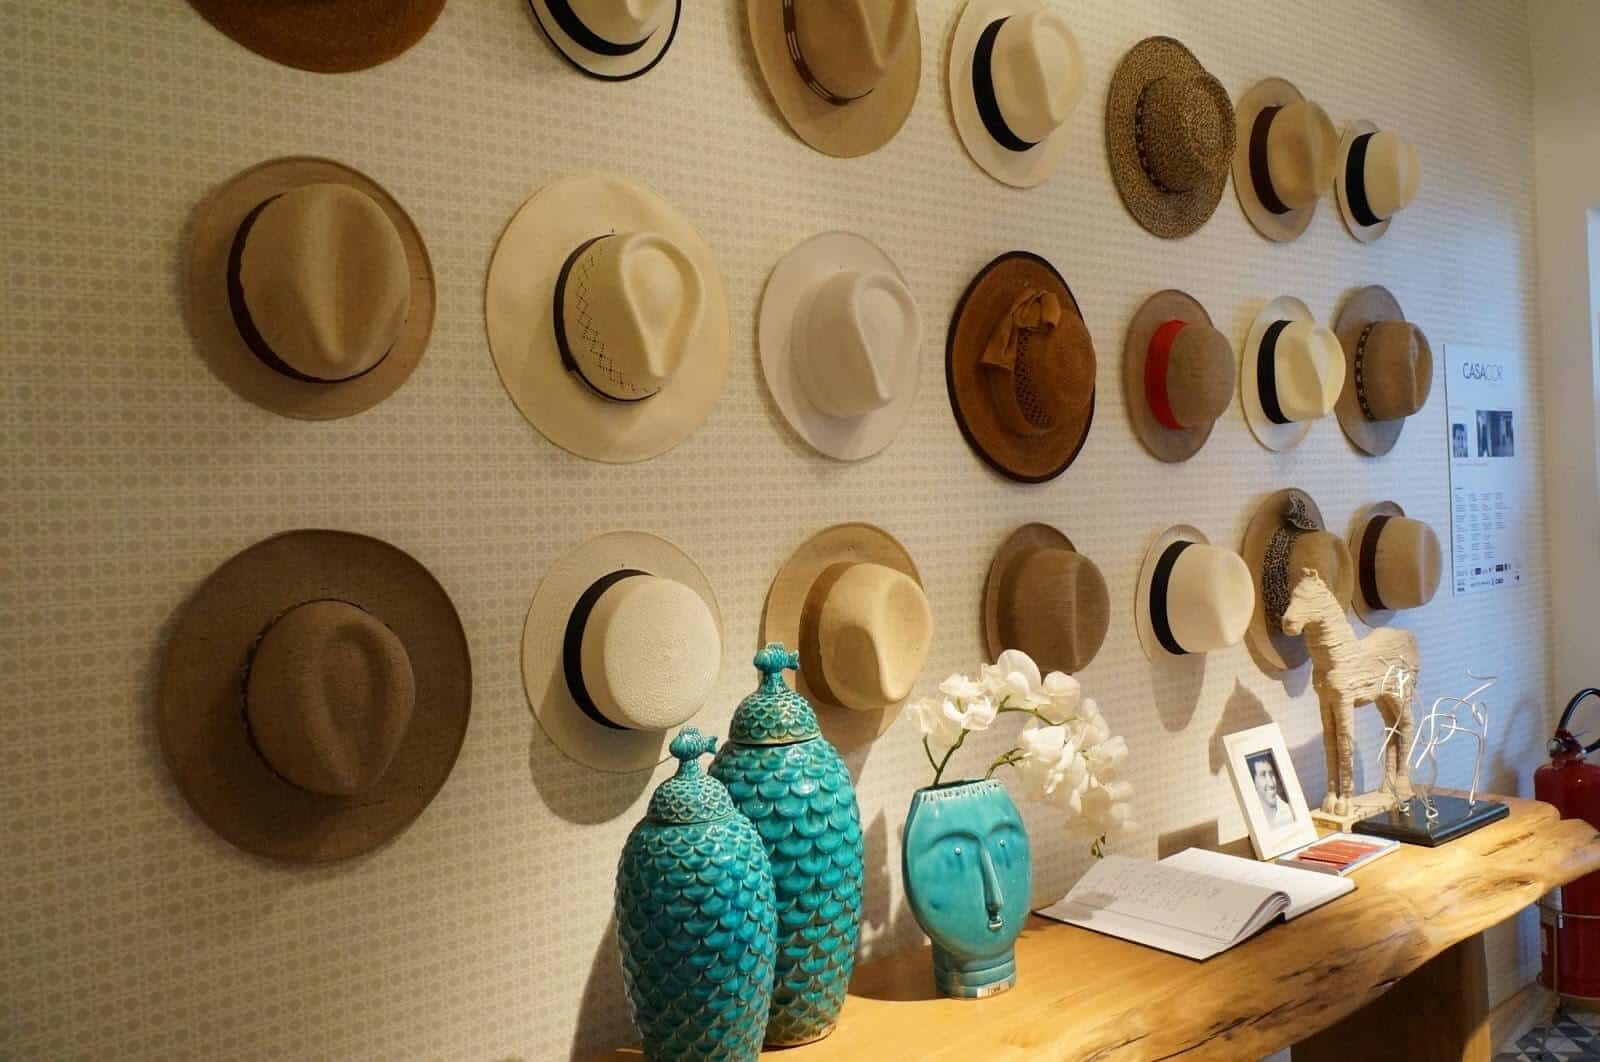
Simple Wall Display Hat Rack

You do want your hats to look organized, but you don’t want the organization to look messy.
Apply this idea to your room!
Using a wall display board, you only need to install some hooks to the surface. Then, you can hang your hats there safely.
The Mirror Hat Hooks

If the hats you own are not that many. Install some hooks on the wooden border of your mirror.
As seen above, it looks super simple, but it sends a coastline vibe as if you live by the beach. This idea offers you simplicity, and it gives you elegance.
Hanging Chain for Hat Rack

If your closet is full, but you need more space to hang the hats, all you need to have is a long chain that strong enough to hold your collection of hats.
You can hang the chain across the room or in any style you like. To hang the hats, you can place some hooks on to the holes in the chain.
Organizing Hats on the Wall Rack

This idea is a bit different compared to the previous ideas because this doesn’t hang the hats. Instead, it piles up the hats. The advantage of this hat, you don’t eat too much space.
However, if your intention is to display your collection, this style will only make the front hat visible, but the other hats invisible to be seen.
Hipster Style Wall Hooks

Inspired by the tapestry seen on each side, you can use this hipster style of hat racks. It is as simple as it’s seen because you only need to install the hook to the wall by nailing them.
Don’t forget to place the hooks in tidy order, as shown in the picture. Also, make a precise measurement of the gap between each hook to create a neat looking hat rack.
Old, Rustic, Giant Wheel Hat Rack

Are you going for a classic, vintage style of hat rack? Try this one!
- You need to go to a market and find this old-looking, rustic wheel.
- After that, polish the wood to make it looks smoother and fresher.
- Then, hang all the hats to the wheel.
The disadvantage of this idea is the number of hooks is very limited to only 6 hats.
Other DIY Ideas to try:
The Corner Mount Hat Rack

Make use of the corner of your room to something more advantageous, like this one!
All you need to have are hooks, nails, and hats.
Firstly, install the hooks on the wall with nails.
Don’t be too orderly, because the idea of this look is to create a rather disorder look.
This is very suitable for those of you who have a small room, but collect a number of beach hats. Since it would eat too much space in the closet, it is best to hang them on the wall.
Simple White Horizontal Hat Hooks

If you want the hooks to have a multipurpose, you can use this idea. It takes you to find long wood and smaller woods.
- First of all, measure the length of the wood, and then measure the gap you would put between each hook.
- Using a drill or woodworking tool, create holes in between the gaps.
- Second of all, change the smaller woods into a circle shape.
- Insert these circle shape woods to the holes drilled earlier and voila!
This simple, vertical hooks can be used not only for hats but also for coats or even keys.
Old Rustic Vintage Iron Hat Rack

An old, vintage hat rack would give the entire room a classic atmosphere. Having this rack installed in the room would create a superb environment.
The rack is mounted to the wall, and it takes up quite a lot of space on the wall. If the hats you are hooking are beach hats, this also may eat more space forward.
Tupperware Boxes Hat Storage

This idea is very suitable for you who don’t have a lot of space on the walls for mounting hat racks. If you have a lot of boxes, they can be used for storing your snapbacks.
The boxes can be adjusted to how many snapbacks you personally owned. Then, place the boxes in a secured area such as under your bed.
Hidden Hat Rack

This idea is specially made for you who have a small number of hats but want them to look tidy and neat.
You can hang them on the wall near your wardrobe. Since they don’t take too much space, the space you give for them can be hidden among your clothes or at the corner of your room.
Glass Box Hat Storage Idea

Snapbacks have smaller sizes compared to hats worn for a day at the beach. Snapbacks can be stored in medium boxes.
If you want to display the snaps, use glass boxes, so the design of the snaps is shown and easily seen. Make sure you have provided the space to place the boxes, so it won’t look messy.
A Giant Elk Horn Hat Rack

Nature is an interesting place. It gives a sense of relaxation and freedom when you are in nature. Now, you can bring nature home.
This idea offers you to use a giant elkhorn for hanging your hats. You can find one like this in a vintage shop.
At least if it is not 100% real, it is made of something resembles the original.
Wall Mounted Branch Hat Racks

A simple design would give a sense of the room to become more spacious.
This design is created for you, who only have several hats. The hats can be hanged using strings attached to a branch.
- All you need to find is a branch and some strings.
- Firstly, check the branch if it is still strong enough to hold some hats hanging around.
- Then, stick the branch to the wall using adhesive.
- You can freely tie the string in any part of the branch.
More Hat Rack Ideas


